Signing Git Commits using KeyBase
With the increasing popularity of Git as a tool for open source collaboration, not to mention distribution of code for tools like Go, being able to verify that the author of a piece of code is indeed who they claim to be has become absolutely critical.
This requirement extends beyond simply ensuring that malicious actors cannot modify the code we've published, something GitHub and its kin (usually) do a very good job of preventing. The simple fact is that by adopting code someone else has written, you are entrusting your clients' security to them - you best be certain that trust is wisely placed.
Using Git's built in support for PGP signing and pairing it with Keybase provides you with a great framework on which to build and verify that trust. In this post I'll go over how one sets up their development environment to support this workflow.
Why should I sign my commits?
There are two groups of people who tend to publish open source code. The first is people who don't see much value in what they write and are looking for a free place to store their projects, or are simply looking for a nice way to share an idea with friends. To these people, the code they release isn't of critical value and will likely never be used in a larger project.
On the other end of the scale, you'll find people who develop and maintain open source libraries and applications. Some of these people do it for fun, others because it's part of their job and in many cases because they see no reason not to. To these people and groups, reputation is an incredibly important aspect of the work they do and critical their professional relationships.
If you fall into the former group, chances are the benefits of signed commits will be lost on you. However as a member of the latter group, the notion of someone being able to masquerade as you with potentially malicious intent is probably rather frightening.
By signing your commits with a publicly verifiable identity you make it significantly more difficult for someone to impersonate you without the subterfuge being noticed.
Don't believe me, have a read through this Git Horror Story for a great example of what can go wrong and how signing your commits can help prevent it.
Besides, you'll get a cool badge on GitHub...

What is Keybase
This brings us to the topic of publicly verifiable and auditable identities. This specific notion is not a new one, having been extensively applied through the notion of a Web of Trust. The concept is that if you trust person A and they trust person B, then you are able to trust person B. This can be extended to include levels of trust, in which case your trust in a person you've not directly met can be calculated as the minimum trust level in the chain connecting you.
Keybase automates this process by using your social identities to build that chain of trust in an easily accessible manner. If you're not using it yet, it's worth signing up now.
On top of its Web of Trust, Keybase also offers a great bunch of command line tools and even a secure, distributed, filesystem which allows you to easily share encrypted files with people.
Why should I use Keybase for signing my commits?
This is where the pairing of publicly auditable trust chains and signed commits really starts to shine. By requiring that all commits are signed, you ensure[1] that commits are originating from a known source[2]. Pairing this with a publicly auditable trust chain like Keybase and you are able to confirm the identity of the person writing the code, allowing you to make an educated decision regarding whether you trust them or not.
By using Keybase, you make it very easy for your audience to quickly verify that you're who you claim to be and that you're the kind of person worthy of their trust.
How do I setup it up?
This is where things start getting interesting, it's actually rather straightforward to configure your environment to automatically sign all your commits.
GPG Tools
To get started, you'll need to make sure you have the GPG tools installed on your machine. Unless you're on Windows, chances are you already have GPG installed on your machine. You can check by opening a terminal and running the gpg command. You should see something like the following...
$ gpg --version
gpg (GnuPG) 2.0.30 (Gpg4win 2.3.3)
libgcrypt 1.6.6
Copyright (C) 2015 Free Software Foundation, Inc.
License GPLv3+: GNU GPL version 3 or later <http://gnu.org/licenses/gpl.html>
This is free software: you are free to change and redistribute it.
There is NO WARRANTY, to the extent permitted by law.

Home: C:/Users/bpannell/AppData/Roaming/gnupg
Supported algorithms:
Pubkey: RSA, RSA, RSA, ELG, DSA
Cipher: IDEA (S1), 3DES (S2), CAST5 (S3), BLOWFISH (S4), AES (S7),
        AES192 (S8), AES256 (S9), TWOFISH (S10), CAMELLIA128 (S11),
        CAMELLIA192 (S12), CAMELLIA256 (S13)
Hash: MD5 (H1), SHA1 (H2), RIPEMD160 (H3), SHA256 (H8), SHA384 (H9),
      SHA512 (H10), SHA224 (H11)
Compression: Uncompressed (Z0), ZIP (Z1), ZLIB (Z2), BZIP2 (Z3)
If you are on Windows, you'll need to download and install the Gpg4Win tools, which you can grab here.
Importing your Keybase Key
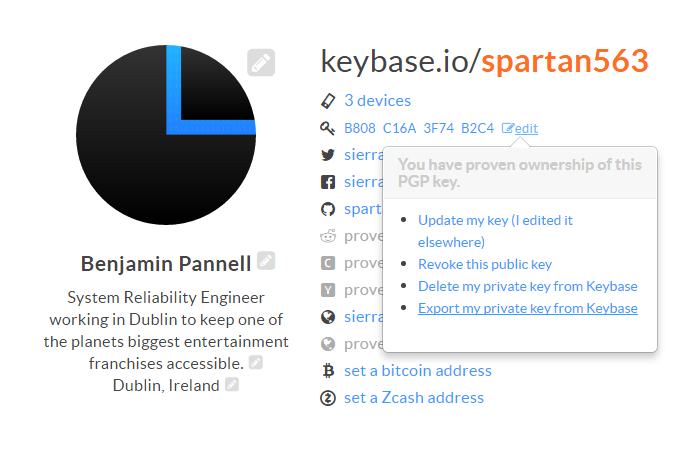
Once you've got the GPG tools installed on your machine, you'll need to grab your Keybase private key. You should be able to find it on your account page.
Save it somewhere on your computer and then fire up your command line again to import the key. Assuming you've called your key file keybase.gpg, just run the following command.
$ gpg --import keybase.gpg
gpg: your name [ID]: public key [Name, e-mail] was imported
gpg: Total number of treated keys: 1
gpg:                 imported: 1  (RSA: 1)
At this point, you should be able to see the key in gpg --list-keys.
$ gpg --list-keys
gpg: using PGP trust model
~/gnupg/pubring.gpg
---------------------------------------------------
pub   4096R/3F74B2C4 2015-04-08
uid       [ unknown] keybase.io/spartan563 <spartan563@keybase.io>
sub   2048R/70D375E4 2015-04-08 [expires: 2023-04-06]
sub   2048R/EA0B4FE2 2015-04-08 [expires: 2023-04-06]
Adding Identities to your Keybase Key
At this point, you've probably noticed that your Keybase key only has your $user@keybase.io email address linked to it. I'm assuming you don't want to commit using this email (not to mention, you wouldn't be able to verify it as that email address doesn't work).
To fix this problem, we're going to add some new identities to your key through the gpg tool.
$ gpg --edit-key $user@keybase.io
gpg>
You'll be presented with a console in which you can make changes to your key by issuing commands. You'll want to use the adduid command to add a new user identity.
gpg> adduid
Real Name: Benjamin Pannell
Email address: admin@sierrasoftworks.com
Comment:
You selected this USER-ID:
  "Benjamin Pannell <admin@sierrasoftworks.com>"

Change (N)ame, (C)omment, (E)mail or (O)kay/(Q)uit?
After filling in your details, you'll be prompted to make any fixes which are necessary and then enter O to finish the operation. It'll pop up a window asking you to enter your private key's password after which you can repeat the operation for each additional identity you wish to add.
If you wish to use an identity with Git, make sure you don't add a comment as doing so will make it tricky to have Git recognize the identity.
Once you're done, type save to finish up and save your new key file.
Git
Now that you've got your key configured correctly, let's go ahead and configure your Git installation to work with it. First thing to do is make sure your Git user is configured correctly. Make sure you use a name and email which match one of your identities.
git config --global user.name "Benjamin Pannell"
git config --global user.email "admin@sierrasoftworks.com"
Once that's done, tell Git to sign your commits by default. This isn't strictly necessary, however it's a good practice to get into as it'll give you a nice, auditable commit trail and allow you to quickly spot something which is out of place.
git config --global commit.gpgsign true
Windows Configuration
One last thing, on Windows you may need to configure the correct GPG client to use. For whatever reason, the default setup tends to fall over when trying to request your password...
To fix this, you'll need to point Git to the right gpg.exe file.
git config --global gpg.program "C:\Program Files (x86)\GNU\GnuPG\gpg2.exe"
GitHub
At this point all the commits you're making should be signed properly. However all that is for naught if people can't verify their integrity. While one can always use Git's --show-signature command, chances are your users will want something a bit...prettier.
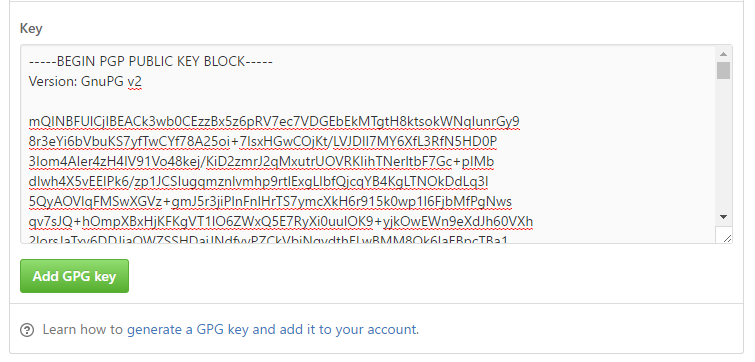
That's where GitHub's support for GPG keys comes in very handy. Head on over to your Account page and you'll find a GPG keys section where you can add a new GPG key.
To do this, you'll want to export your public GPG key with its various identities and paste the armored data in GitHub.
gpg --armor --export $user@keybase.io | clip
gpg --armor --export $user@keybase.io
Once you've copied your public key from the command above (the PowerShell one will automatically add it to your clipboard on Windows machines), just paste the result in the GitHub key window.
You should now have your GPG public key added to GitHub, after verifying the email addresses associated with it you'll be able to submit commits to GitHub and get your awesome Verified badge.
Conclusion
You should now be in a position to sign every commit you make using your own personal, publicly verifiable key. In doing so you are contributing towards a culture of security, responsibility and quality stewardship in the open source community.
Even if you're a small time contributor, signing your work is a great way to give project maintainers faith in your work, especially if you present high quality contributions and engage a narrative with the project's owners.
If you've got any other questions on the topic, please leave them in the comments.